Install Kubernetes
Ensure docker service is running.
sudo systemctl status -l docker
Returns:
● docker.service - Docker Application Container Engine
   Loaded: loaded (/usr/lib/systemd/system/docker.service; enabled; vendor preset: disabled)
   Active: active (running) since Fri 2019-07-05 18:27:58 UTC; 27min ago
     Docs: https://docs.docker.com
 Main PID: 4541 (dockerd)
    Tasks: 10
   Memory: 102.6M
   CGroup: /system.slice/docker.service
           └─4541 /usr/bin/dockerd -H fd:// --containerd=/run/containerd/containerd.sock

Jul 05 18:27:56 Py4SAS-vm dockerd[4541]: time="2019-07-05T18:27:56.656950369Z" level=info msg="pickfirstBalancer: HandleSubConnStateChange: 0xc4207871f0, READY" module=grpc
Jul 05 18:27:56 Py4SAS-vm dockerd[4541]: time="2019-07-05T18:27:56.824601124Z" level=info msg="[graphdriver] using prior storage driver: overlay2"
Jul 05 18:27:57 Py4SAS-vm dockerd[4541]: time="2019-07-05T18:27:57.247859618Z" level=info msg="Graph migration to content-addressability took 0.00 seconds"
Jul 05 18:27:57 Py4SAS-vm dockerd[4541]: time="2019-07-05T18:27:57.249025552Z" level=info msg="Loading containers: start."
Jul 05 18:27:57 Py4SAS-vm dockerd[4541]: time="2019-07-05T18:27:57.642747702Z" level=info msg="Default bridge (docker0) is assigned with an IP address 172.XX.XX.XX/16.
Daemon option --bip can be used to set a preferred IP address"
Jul 05 18:27:57 Py4SAS-vm dockerd[4541]: time="2019-07-05T18:27:57.714200644Z" level=info msg="Loading containers: done."
Jul 05 18:27:58 Py4SAS-vm dockerd[4541]: time="2019-07-05T18:27:58.435046242Z" level=info msg="Docker daemon" commit=2d0083d graphdriver(s)=overlay2 version=18.09.7
Jul 05 18:27:58 Py4SAS-vm dockerd[4541]: time="2019-07-05T18:27:58.435662560Z" level=info msg="Daemon has completed initialization"
Jul 05 18:27:58 Py4SAS-vm dockerd[4541]: time="2019-07-05T18:27:58.493742119Z" level=info msg="API listen on /var/run/docker.sock"
Jul 05 18:27:58 Py4SAS-vm systemd[1]: Started Docker Application Container Engine.
See Install & Configure Docker on this site.
As root, set kernel parameters for k8s on master and nodes.
cat <<EOF> /etc/sysctl.d/kubernetes.conf
net.ipv4.ip_forward = 1
net.bridge.bridge-nf-call-ip6tables = 1
net.bridge.bridge-nf-call-iptables = 1
EOF
Reload kernel parameters on master and nodes.
modprobe br_netfilter
sysctl --system
Turn off swap on master and nodes.
swapoff -a
sed -e '/swap/s/^/#/g' -i /etc/fstab
Allow k8s service ports on master.
az vm open-port --priority 1111 --resource-group Py4SAS --name Py4SAS-vm  \
--port 6443 \
--port 2379 \
--port 2380 \
--port 6783  \
--port 8080 \
--port 8081 \
--port 10250 \
--port 10251 \
--port 10252
Open ports on worker nodes to allow weave net traffic.
az vm open-port --priority 1113 --resource-group Py4SAS --name Spark-node-vm  \
--port 6783  \
--port 8080 \
--port 8081
Open ports on work nodes to enable k8s service ports.
az vm open-port --priority 1114 --resource-group Py4SAS --name Spark-node-vm  \
--port 10250  \
--port 30000-32767
Add Kubernetes to the yum repo on master and nodes.
cat > /etc/yum.repos.d/kubernetes.repo << EOF
[kubernetes]
name=Kubernetes
baseurl=https://packages.cloud.google.com/yum/repos/kubernetes-el7-x86_64
enabled=1
gpgcheck=1
repo_gpgcheck=1
gpgkey=https://packages.cloud.google.com/yum/doc/yum-key.gpg https://packages.cloud.google.com/yum/doc/rpm-package-key.gpg
EOF
Build yum cache on master and nodes.
sudo yum makecache fast
Install Kuberbnetes on master and nodes.
sudo yum install -y kubelet kubeadm kubectl
Enable kublet service to start at boot-up on master and nodes.
sudo systemctl enable kubelet.service
Start the kubelet service.
sudo systemctl start kubelet
Enable automatic completion of kubectl commands on master and nodes.
source <(kubectl completion bash)
kubectl completion bash > /etc/bash_completion.d/kubectl
On worker nodes install NFS helper program to enable Kubernetes pods to perform volume mounts.
sudo yum install nfs-common nfs-utils -y
Initialize Cluster
Initialize the Kubernetes control plane on the master node.
sudo kubeadm init
Returns.
[init] Using Kubernetes version: v1.15.0
[preflight] Running pre-flight checks
[preflight] Pulling images required for setting up a Kubernetes cluster
[preflight] This might take a minute or two, depending on the speed of your internet connection
[preflight] You can also perform this action in beforehand using 'kubeadm config images pull'
[kubelet-start] Writing kubelet environment file with flags to file "/var/lib/kubelet/kubeadm-flags.env"
[kubelet-start] Writing kubelet configuration to file "/var/lib/kubelet/config.yaml"
[kubelet-start] Activating the kubelet service
[certs] Using certificateDir folder "/etc/kubernetes/pki"
[certs] Generating "front-proxy-ca" certificate and key
[certs] Generating "front-proxy-client" certificate and key
[certs] Generating "etcd/ca" certificate and key
[certs] Generating "etcd/server" certificate and key
[certs] etcd/server serving cert is signed for DNS names [py4sas-vm localhost] and IPs [10.0.0.4 127.0.0.1 ::1]
[certs] Generating "etcd/peer" certificate and key
[certs] etcd/peer serving cert is signed for DNS names [py4sas-vm localhost] and IPs [10.0.0.4 127.0.0.1 ::1]
[certs] Generating "etcd/healthcheck-client" certificate and key
[certs] Generating "apiserver-etcd-client" certificate and key
[certs] Generating "ca" certificate and key
[certs] Generating "apiserver" certificate and key
[certs] apiserver serving cert is signed for DNS names [py4sas-vm kubernetes kubernetes.default kubernetes.default.svc kubernetes.default.svc.cluster.local] and IPs [10.96.0.1 10.0.0.4]
[certs] Generating "apiserver-kubelet-client" certificate and key
[certs] Generating "sa" key and public key
[kubeconfig] Using kubeconfig folder "/etc/kubernetes"
[kubeconfig] Writing "admin.conf" kubeconfig file
[kubeconfig] Writing "kubelet.conf" kubeconfig file
[kubeconfig] Writing "controller-manager.conf" kubeconfig file
[kubeconfig] Writing "scheduler.conf" kubeconfig file
[control-plane] Using manifest folder "/etc/kubernetes/manifests"
[control-plane] Creating static Pod manifest for "kube-apiserver"
[control-plane] Creating static Pod manifest for "kube-controller-manager"
[control-plane] Creating static Pod manifest for "kube-scheduler"
[etcd] Creating static Pod manifest for local etcd in "/etc/kubernetes/manifests"
[wait-control-plane] Waiting for the kubelet to boot up the control plane as static Pods from directory "/etc/kubernetes/manifests". This can take up to 4m0s
[apiclient] All control plane components are healthy after 21.003839 seconds
[upload-config] Storing the configuration used in ConfigMap "kubeadm-config" in the "kube-system" Namespace
[kubelet] Creating a ConfigMap "kubelet-config-1.15" in namespace kube-system with the configuration for the kubelets in the cluster
[upload-certs] Skipping phase. Please see --upload-certs
[mark-control-plane] Marking the node py4sas-vm as control-plane by adding the label "node-role.kubernetes.io/master=''"
[mark-control-plane] Marking the node py4sas-vm as control-plane by adding the taints [node-role.kubernetes.io/master:NoSchedule]
[bootstrap-token] Using token: 2qude6.q0wvgg9w1ns2oy3p
[bootstrap-token] Configuring bootstrap tokens, cluster-info ConfigMap, RBAC Roles
[bootstrap-token] configured RBAC rules to allow Node Bootstrap tokens to post CSRs in order for nodes to get long term certificate credentials
[bootstrap-token] configured RBAC rules to allow the csrapprover controller automatically approve CSRs from a Node Bootstrap Token
[bootstrap-token] configured RBAC rules to allow certificate rotation for all node client certificates in the cluster
[bootstrap-token] Creating the "cluster-info" ConfigMap in the "kube-public" namespace
[addons] Applied essential addon: CoreDNS
[addons] Applied essential addon: kube-proxy

Your Kubernetes control-plane has initialized successfully!

To start using your cluster, you need to run the following as a regular user:

  mkdir -p $HOME/.kube
  sudo cp -i /etc/kubernetes/admin.conf $HOME/.kube/config
  sudo chown $(id -u):$(id -g) $HOME/.kube/config

You should now deploy a pod network to the cluster.
Run "kubectl apply -f [podnetwork].yaml" with one of the options listed at:
  https://kubernetes.io/docs/concepts/cluster-administration/addons/

Then you can join any number of worker nodes by running the following on each as root:

kubeadm join 10.0.0.4:6443 --token 2qude6.q0wvgg9w1ns2oy3p \
    --discovery-token-ca-cert-hash sha256:fe5cf8cd145d6b249d72f3b1a3539dc67dc8c2eb23099201f8a674eb56f48b3c
To use the cluster run the following as a regular user on the master.
mkdir -p $HOME/.kube
sudo cp -i /etc/kubernetes/admin.conf $HOME/.kube/config
sudo chown $(id -u):$(id -g) $HOME/.kube/config
On the worker nodes as root, join the node to the cluster.
kubeadm join 10.0.0.4:6443 --token 2qude6.q0wvgg9w1ns2oy3p \
    --discovery-token-ca-cert-hash sha256:fe5cf8cd145d6b249d72f3b1a3539dc67dc8c2eb23099201f8a674eb56f48b3c
Returns.
[preflight] Running pre-flight checks
[preflight] Reading configuration from the cluster...
[preflight] FYI: You can look at this config file with 'kubectl -n kube-system get cm kubeadm-config -oyaml'
[kubelet-start] Downloading configuration for the kubelet from the "kubelet-config-1.15" ConfigMap in the kube-system namespace
[kubelet-start] Writing kubelet configuration to file "/var/lib/kubelet/config.yaml"
[kubelet-start] Writing kubelet environment file with flags to file "/var/lib/kubelet/kubeadm-flags.env"
[kubelet-start] Activating the kubelet service
[kubelet-start] Waiting for the kubelet to perform the TLS Bootstrap...

This node has joined the cluster:
* Certificate signing request was sent to apiserver and a response was received.
* The Kubelet was informed of the new secure connection details.

Run 'kubectl get nodes' on the control-plane to see this node join the cluster.
On the master, deploy Weave-Net for pod networking services.
kubectl apply -f "https://cloud.weave.works/k8s/net?k8s-version=$(kubectl version | base64 | tr -d '\n')"
Returns.
serviceaccount/weave-net created
clusterrole.rbac.authorization.k8s.io/weave-net created
clusterrolebinding.rbac.authorization.k8s.io/weave-net created
role.rbac.authorization.k8s.io/weave-net created
rolebinding.rbac.authorization.k8s.io/weave-net created
daemonset.extensions/weave-net created
On master check nodes.
kubectl get nodes
Returns.
NAME            STATUS   ROLES    AGE     VERSION
py4sas-vm       Ready    master   19m     v1.15.0
spark-node-vm   Ready    <none>   7m20s   v1.15.0
On master validate all pods are in a running state.
kubectl get pods -A
Returns.
NAMESPACE     NAME                                READY   STATUS    RESTARTS   AGE
kube-system   coredns-5c98db65d4-5b2g9            1/1     Running   0          21m
kube-system   coredns-5c98db65d4-8hs85            1/1     Running   0          21m
kube-system   etcd-py4sas-vm                      1/1     Running   0          19m
kube-system   kube-apiserver-py4sas-vm            1/1     Running   0          20m
kube-system   kube-controller-manager-py4sas-vm   1/1     Running   0          20m
kube-system   kube-proxy-lmqhc                    1/1     Running   0          8m41s
kube-system   kube-proxy-n55qx                    1/1     Running   0          21m
kube-system   kube-scheduler-py4sas-vm            1/1     Running   0          20m
kube-system   weave-net-7p2mw                     2/2     Running   0          3m31s
kube-system   weave-net-7wbrt                     2/2     Running   0          3m31s
Helm
Helm is the package manager for Kubernetes to help simplify the deployment of pods. On the master deploy helm.
Install helm into the default k8s namespace kube-system.
curl https://raw.githubusercontent.com/kubernetes/helm/master/scripts/get | bash
Create the tiller ServiceAccount
kubectl --namespace kube-system create serviceaccount tiller
Returns.
serviceaccount/tiller created
Give the ServiceAccount full permissions to manage the cluster.
kubectl create clusterrolebinding tiller --clusterrole cluster-admin --serviceaccount=kube-system:tiller
Returns.
clusterrolebinding.rbac.authorization.k8s.io/tiller created
Initialize helm.
helm init --service-account tiller --wait
Returns.
Creating /home/trb/.helm
Creating /home/trb/.helm/repository
Creating /home/trb/.helm/repository/cache
Creating /home/trb/.helm/repository/local
Creating /home/trb/.helm/plugins
Creating /home/trb/.helm/starters
Creating /home/trb/.helm/cache/archive
Creating /home/trb/.helm/repository/repositories.yaml
Adding stable repo with URL: https://kubernetes-charts.storage.googleapis.com
Adding local repo with URL: http://127.0.0.1:8879/charts
$HELM_HOME has been configured at /home/trb/.helm.

Tiller (the Helm server-side component) has been installed into your Kubernetes Cluster.
As a backing store for Jupyter notebooks use Postgres as an alternative to SQLite. Begin by installing the NFS-server provisioner.
helm install stable/nfs-server-provisioner --namespace nfsprovisioner --set=storageClass.defaultClass=true
Returns.
NOTES:
The NFS Provisioner service has now been installed.

A storage class named 'nfs' has now been created
and is available to provision dynamic volumes.

You can use this storageclass by creating a `PersistentVolumeClaim` with the
correct storageClassName attribute. For example:

    ---
    kind: PersistentVolumeClaim
    apiVersion: v1
    metadata:
      name: test-dynamic-volume-claim
    spec:
      storageClassName: "nfs"
      accessModes:
        - ReadWriteOnce
      resources:
        requests:
          storage: 100Mi
Add Postgres to the helm repo.
helm repo add bitnami https://charts.bitnami.com/bitnami
Returns.
"bitnami" has been added to your repositories
Update the repo.
helm repo update
Returns.
Hang tight while we grab the latest from your chart repositories...
...Skip local chart repository
...Successfully got an update from the "bitnami" chart repository
...Successfully got an update from the "stable" chart repository
Install Postgress with arguments.
helm upgrade --install pgdatabase --namespace pgdatabase bitnami/postgresql \
--set postgresqlPassword=Postgres_Password \
--set postgresqlDatabase=jhubdb
Returns.
NOTES:
** Please be patient while the chart is being deployed **

PostgreSQL can be accessed via port 5432 on the following DNS name from within your cluster:

    pgdatabase-postgresql.pgdatabase.svc.cluster.local - Read/Write connection
To get the password for "postgres" run:

    export POSTGRES_PASSWORD=$(kubectl get secret --namespace pgdatabase pgdatabase-postgresql -o jsonpath="{.data.postgresql-password}" | base64 --decode)

To connect to your database run the following command:

    kubectl run pgdatabase-postgresql-client --rm --tty -i --restart='Never' --namespace pgdatabase --image docker.io/bitnami/postgresql:11.4.0-debian-9-r12 --env="PGPASSWORD=$POSTGRES_PASSWORD" --command -- psql --host pgdatabase-postgresql -U postgres -d jhubdb -p 5432


To connect to your database from outside the cluster execute the following commands:

    kubectl port-forward --namespace pgdatabase svc/pgdatabase-postgresql 5432:5432 &
    PGPASSWORD="$POSTGRES_PASSWORD" psql --host 127.0.0.1 -U postgres -d jhubdb -p 5432
Create the PersistentVolumeClaim by editing the file az_pvc.yaml.
---
    kind: PersistentVolumeClaim
    apiVersion: v1
    metadata:
      name: test-dynamic-volume-claim
    spec:
      storageClassName: "nfs"
      accessModes:
        - ReadWriteOnce
      resources:
        requests:
          storage: 100Mi
Apply the PersistentVolumeClaim to the pgdatabase namespace.
kubectl apply -f az_pvc.yaml -n pgdatabase
Returns.
persistentvolumeclaim/test-dynamic-volume-claim created
Ensure Postgres pod is running.
kubectl --namespace pgdatabase get pods
Returns.
NAME                      READY   STATUS    RESTARTS   AGE
pgdatabase-postgresql-0   1/1     Running   1          8m
Install Jupyterhub
JupyterHub requires a config.yaml file. It will contain the multiple helm values to configure a JupyterHub chart.
Generate Proxy.secret Token.
openssl rand -hex 32
Returns.
f74aXXXXXXXXXXXXXXXXXXXXXXXXXXXXXXXXXXXXXXXXXXXXXXXXXXXXXXXXXXX
Create the config.yaml file and copy/paste the configuration below.
vi config.yaml
  proxy:
    secretToken: <<secret proxy token goes here>>

  db:
    url: postgres+psycopg2://postgres:change_this_password@pgdatabase-postgresql.pgdatabase.svc.cluster.local:5432/jhubdb
    type: postgres
    password: change_this_password

singleuser:
  cpu:
    limit: 1
    guarantee: 0.05
  memory:
    limit: 2G
    guarantee: 512M
  storage:
    type: none

# culling old users, unit: seconds
cull:
  enabled: true
  timeout: 1800
  every: 300

auth:
  admin:
    users:
      - admin
    access: false

# allow image to be prepulled
prePuller:
  continuous:
    enabled: true

# pod priority - scale up nodes ahead of real users arrivals
# user scheduler - pack users tight on some nodes
scheduling:
  userScheduler:
    enabled: true
  podPriority:
    enabled: true
Create the jhub namespace.
kubectl create namespace jhub
Returns.
namespace/jhub created
Add Jupyterhub to the repo.
helm repo add jupyterhub https://jupyterhub.github.io/helm-chart/
Returns.
"jupyterhub" has been added to your repositories
Update helm repo.
helm repo update
Returns.
Hang tight while we grab the latest from your chart repositories...
...Skip local chart repository
...Successfully got an update from the "jupyterhub" chart repository
...Successfully got an update from the "bitnami" chart repository
...Successfully got an update from the "stable" chart repository
Update Complete.
Search the Jupyterhub repo.
helm search jupyterhub
Returns.
NAME                    CHART VERSION   APP VERSION     DESCRIPTION
jupyterhub/jupyterhub   0.9-fe7b5df     1.0.0           Multi-user Jupyter installation
jupyterhub/binderhub    0.2.0-f98a1d0                   A helm chart to install Binder
Install the latest release of Jupyterhub.
RELEASE=jhub
NAMESPACE=jhub

helm upgrade --install $RELEASE jupyterhub/jupyterhub \
--namespace $NAMESPACE \
--version=0.8.2 \
--values config.yaml
Returns.
NOTES:
Thank you for installing JupyterHub!

Your release is named jhub and installed into the namespace jhub.

You can find if the hub and proxy is ready by doing:

 kubectl --namespace=jhub get pod

and watching for both those pods to be in status 'Ready'.

You can find the public IP of the JupyterHub by doing:

 kubectl --namespace=jhub get svc proxy-public

It might take a few minutes for it to appear!
Validate JupyterHub.
kubectl get pods -n jhub
Returns.
NAME                     READY   STATUS    RESTARTS   AGE
hub-558dcfcd85-pltxp     1/1     Running   2          2m17s
proxy-65bc89f46c-g4pg6   1/1     Running   0          2m17s
Find the service IP address and port number on the master for the entry point. Notice the proxy-public pod is in a pending state.
kubectl get services -n jhub
Returns.
NAME           TYPE           CLUSTER-IP       EXTERNAL-IP   PORT(S)                      AGE
hub            ClusterIP      10.102.231.228   <none>        8081/TCP                     9m18s
proxy-api      ClusterIP      10.108.212.77    <none>        8001/TCP                     9m18s
proxy-public   LoadBalancer   10.101.23.89     <pending>     80:32696/TCP,443:31802/TCP   9m18s
Since this is a POC we can skip the use of an Azure load balancer and configure a software version using a Metal Load Balancer. In a production environment we would configure an Azure Load Balancer.
Apply the metallb.yaml configuration first.
kubectl apply -f https://raw.githubusercontent.com/google/metallb/v0.7.3/manifests/metallb.yaml
Returns.
namespace/metallb-system created
serviceaccount/controller created
serviceaccount/speaker created
clusterrole.rbac.authorization.k8s.io/metallb-system:controller created
clusterrole.rbac.authorization.k8s.io/metallb-system:speaker created
role.rbac.authorization.k8s.io/config-watcher created
clusterrolebinding.rbac.authorization.k8s.io/metallb-system:controller created
clusterrolebinding.rbac.authorization.k8s.io/metallb-system:speaker created
rolebinding.rbac.authorization.k8s.io/config-watcher created
daemonset.apps/speaker created
deployment.apps/controller created
Create the custom metal load balanacer configuration in the metal_config.yaml file.
vi metal_config.yaml
adding:
apiVersion: v1
kind: ConfigMap
metadata:
  namespace: metallb-system
  name: config
data:
  config: |
    address-pools:
    - name: default
      protocol: layer2
      addresses:
      - 10.XX.XX.XX-10.XX.XX.XX
These are the private IP addresses Azure assigns to the master and the nodes.
Apply the custom metal load balanacer configuration metal_config.yaml.
kubectl apply -f metal_config.yaml
Returns.
configmap/config created
Validate the Metal Load Balancer.
kubectl --namespace=metallb-system get pods
Returns.
NAME                          READY   STATUS    RESTARTS   AGE
controller-547d466688-wrf7f   1/1     Running   0          3m5s
speaker-gkd24                 1/1     Running   0          3m5s
Recheck services. Notice the proxy-public pod has gone from a pending state to one where the Metal Load Balancer IP address is now assigned as the EXTERNAL-IP for the pod.
kubectl --namespace jhub get service
Returns.
NAME           TYPE           CLUSTER-IP       EXTERNAL-IP   PORT(S)                      AGE
hub            ClusterIP      10.102.231.228   <none>        8081/TCP                     36m
proxy-api      ClusterIP      10.108.212.77    <none>        8001/TCP                     36m
proxy-public   LoadBalancer   10.101.23.89     10.XX.XX.XX   80:32696/TCP,443:31802/TCP   36m
Configure NGINX reverse proxy
Details on this site for installation and initial configuration of the NGINX Proxy server are here.
Create the site-specific configuration file /etc/nginx/sites-available/default.
sudo vi /etc/nginx/sites-available/default
adding:
# Default server configuration
#

server {
    listen 80 default_server;
    listen [::]:80 default_server;
    root /var/www/html;
    index index.html index.htm index.nginx-debian.html;
    server_name _;
    location / {
        proxy_pass http:104.XX.XX.XXX;
        proxy_redirect off;
        proxy_http_version 1.1;
        proxy_set_header Upgrade $http_upgrade;
        proxy_set_header Connection 'upgrade';
        proxy_set_header Host $host;
        proxy_cache_bypass $http_upgrade;
    }
    access_log /root/logs/nginx-access.log;
    error_log /root/logs/nginx-error.log;

}
Validate changes to the NGINX configuration file.
sudo nginx -t
Returns.
nginx: the configuration file /etc/nginx/nginx.conf syntax is ok
nginx: configuration file /etc/nginx/nginx.conf test is successful
Restart NGINX.
sudo systemctl reload nginx
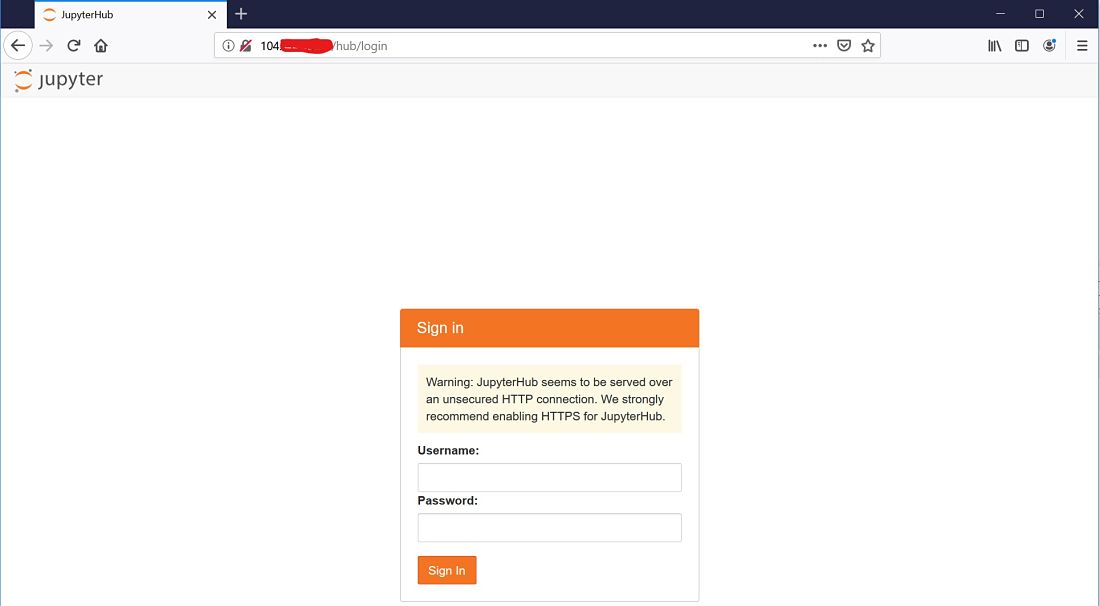
Access the JupyterHub container.
http://104.XXX.XX.XX:80